Vagrant 1.9.4からWindowsゲストに対してWindowsにポートされたWin32-OpenSSHを使いSSHで通信を行うWinSSH Communicatorが導入されており*1、先日この機能を知り気になったので試してみました。
WinSSH Communicatorは利用者が全然いないのかドキュメントがあまり整備されておらず本エントリの内容もかなりてさぐりな感じとなっています。
検証環境について
今回は以下の環境で検証しました。
ホスト
- 64bit版 Windows 10 Pro (1703)
- Vagrant 2.0.1
- VirtualBox 5.2.6
- OpenSSH Client 0.0.24.0
ゲスト
- Windows Server 2016 (GUIあり)
- OSインストール直後の状態に最新のWindows Updateを適用
- OpenSSH Server 0.0.24.0
Win32-OpenSSH Serverのインストール
WinSSH CommunicatorではゲストのWindowsにWin32-OpenSSHをインストールしてsshdを動作させておく必要があります。
インストール手順
基本的に公式サイトの手順をそのまま実行するだけです。
本エントリでは最新のVer.0.0.24.0を使用します。
以降の作業は要管理者権限です。
# 要管理者権限
# OpenSSHのダウンロードと展開
# C:\Program Files\配下に展開しています
Invoke-WebRequest -Uri "https://github.com/PowerShell/Win32-OpenSSH/releases/download/0.0.24.0/OpenSSH-Win64.zip" -OutFile "OpenSSH-Win64.zip"
Expand-Archive -Path ".\OpenSSH-Win64.zip" -DestinationPath "$env:ProgramFiles"

# Pathの追加
[Environment]::SetEnvironmentVariable('PATH', [Environment]::GetEnvironmentVariable('PATH') + ";$(Join-Path $env:ProgramFiles "OpenSSH-Win64")")

# sshdのセットアップ
# カレントディレクトリを移動しておかないと ssh-keygen で作られるキーの場所が不正になる
cd (Join-Path $env:ProgramFiles "OpenSSH-Win64")
.\install-sshd.ps1

# ホストキーの作成とアクセス権の更新
.\ssh-keygen.exe -A
.\FixHostFilePermissions.ps1 -Confirm:$false

# Firewallを設定しポートを開けておく
New-NetFirewallRule -Name sshd -DisplayName 'OpenSSH Server (sshd)' -Service sshd -Enabled True -Direction Inbound -Protocol TCP -Action Allow
続けて鍵認証を許可するためにsshd_configの以下のコメントを解除します。
#RSAAuthentication yes
#PubkeyAuthentication yes

↓ コメント解除

RSAAuthentication yes
PubkeyAuthentication yes
PowerShellからだと以下の様にして置換できます。
# sshd_configを更新し、鍵認証を許可する
cd (Join-Path $env:ProgramFiles "OpenSSH-Win64")
(Get-Content .\sshd_config -Encoding utf8) -replace '#RSAAuthentication yes','RSAAuthentication yes' -replace '#PubkeyAuthentication yes','PubkeyAuthentication yes' `
  | Out-String `
  | % { [Text.Encoding]::UTF8.GetBytes($_) } `
  | Set-Content -Path .\sshd_config -Encoding Byte
また、OpenSSHで接続した際のデフォルトシェルはコマンドプロンプトなのですが、レジストリ設定で変更することが可能です。
本エントリでは以下のコマンドを実行してPowerShellに変えておきます。
# OpenSSHのデフォルトシェルをPowerShellに変更
$RegPath = "HKLM:\SOFTWARE\OpenSSH"
If ( !(Test-Path $RegPath -PathType Container) ) {
    New-Item $RegPath
}
Set-ItemProperty $RegPath -Name DefaultShell -Type String -value "C:\Windows\System32\WindowsPowerShell\v1.0\powershell.exe"
最後にsshdサービスの設定を変更し起動します。
Set-Service sshd -StartupType Automatic
Set-Service ssh-agent -StartupType Automatic
Start-Service sshd
これでOpenSSH Serverの設定は完了です。
Vagrant Boxの設定
WinSSH Communicatorを使う際のVagrant Boxの設定については残念ながらドキュメント化されていません。
基本的にはWinRM Communicatorを使う際の手順にSSHで接続するための設定を追加しておけば良いかと思います。
以前に書いたこちらのエントリを参考にしてください。
本エントリでは、上記エントリをベースにしつつできるだけ最小限の設定にできないか試し、以降の手順で動作させることができました。
1. WinRMの有効化
WinSSH CommunicatorではWinRMを使わないのでWinRMの設定は不要かと思っていたのですが、Vagrantのネットワーク設定にWinRMのバージョンチェックがあり、Communicatorの設定に関わらずこの処理が呼ばれているためWinRMを有効にしていないとvagrant up時に異常終了してしまいます。
今後この挙動は改善されるかもしれませんが現状WinSSH Communicatorを使う際もWinRMを有効にしておく必要があります。
PowerShellから以下のコマンドを実行しておいてください。
# 要管理者権限
winrm quickconfig -q
winrm set winrm/config/winrs '@{MaxMemoryPerShellMB="512"}'
winrm set winrm/config '@{MaxTimeoutms="1800000"}'
winrm set winrm/config/service '@{AllowUnencrypted="true"}'
winrm set winrm/config/service/auth '@{Basic="true"}'
sc.exe config WinRM start= auto
また、Vagrantと直接関連しないのですが、Windows Server 2012 R2以降であればSet-WSManQuickConfigを実行しておいた方が良いでしょう。
# Windows Server 2012 R2以降
Set-WSManQuickConfig -Force
2. シャットダウンイベントの追跡ツールの無効化(Server Core以外)
vagrant haltコマンド実行時にシャットダウンの問い合わせを出さない様にするためにシャットダウンイベントの追跡ツールの無効化を行います。
# このコマンドからシャットダウンイベントの追跡ツールを無効化した場合、ローカルグループポリシーエディタ上に反映されません。

# デフォルト状態ではReliabilityキーは存在していません。
$RegPath = "HKLM:\SOFTWARE\Policies\Microsoft\Windows NT\Reliability"
If ( ! (Test-Path $RegPath -PathType Container) ) {
    New-Item $RegPath
}
Set-ItemProperty $RegPath -name ShutdownReasonOn -Type DWord -value 0
Set-ItemProperty $RegPath -name ShutdownReasonUI -Type DWord -value 0
3. サーバーマネージャがログオン時に表示されないようにする(Server Core以外)
サーバーマネージャがログオン時に表示されないようにするため、以下の手順で現在ログオンしているユーザーとDefaultユーザーのレジストリ設定を変更しておきます。
# 現在ログオンしているユーザーと`Default`ユーザーの設定を更新します。
# この更新により新しくユーザープロファイルが作られる際にサーバーマネージャーを自動的に表示しない様にしています。

# Change Current User Setting
$RegPath = "HKCU:\SOFTWARE\Microsoft\ServerManager"
If ( Test-Path $RegPath -PathType Container ) {
    Set-ItemProperty $RegPath -name DoNotOpenServerManagerAtLogon -Type DWord -value 1
}

# Change 'Default' User Setting
$DefaultRegFile = Join-Path (Split-Path $env:USERPROFILE -Parent) 'default\NTUSER.dat'
try {
    reg load HKLM\DefaultUser "$DefaultRegFile"
    $RegPath = "HKLM:\DefaultUser\SOFTWARE\Microsoft\ServerManager"
    If ( Test-Path $RegPath -PathType Container ) {
        Set-ItemProperty $RegPath -name DoNotOpenServerManagerAtLogon -Type DWord -value 1
    }
} finally {
    reg unload HKLM\DefaultUser
}
4. パスワードの複雑性の無効化
次の手順で作るvagrantユーザーに対して単純なパスワードを設定するためにパスワードの複雑性を無効化します。 PowerShellから以下のコマンドを実行してください。
$TempCfgFile = ".\_secpol_{0}.inf" -F [System.IO.Path]::GetRandomFileName()
# Export temp file
secedit /export /cfg $TempCfgFile
# Disable PasswordComplexity and Change password age.
( Get-Content $TempCfgFile -Encoding Unicode ) -replace 'PasswordComplexity = 1','PasswordComplexity = 0' -replace 'MaximumPasswordAge = 42','MaximumPasswordAge = -1' | Out-File $TempCfgFile
# Update security policy
secedit /configure /db $env:windir\security\database\secedit-new.sdb /cfg $TempCfgFile /areas SECURITYPOLICY
# Delete temp file
If( Test-Path -Path $TempCfgFile -PathType Leaf ) {
    Remove-Item -Path $TempCfgFile
}
ちなみにWindows Server 2016であれば上記の代わりにBackup-SecurityPolicyやRestore-SecurityPolicyコマンドレットを使うことも可能です。
#
# Windows Server 2016以降であれば以下の様にしても良い。
#
$TempCfgFile = ".\_secpol_{0}.inf" -F [System.IO.Path]::GetRandomFileName()
# Export temp file
Backup-SecurityPolicy $TempCfgFile
# Disable PasswordComplexity and Change password age.
( Get-Content $TempCfgFile -Encoding Unicode ) -replace 'PasswordComplexity = 1','PasswordComplexity = 0' -replace 'MaximumPasswordAge = 42','MaximumPasswordAge = -1' | Out-File $TempCfgFile
# Restore security policy
Restore-SecurityPolicy -Path (Resolve-Path $TempCfgFile)
# Delete temp file
If( Test-Path -Path $TempCfgFile -PathType Leaf ) {
    Remove-Item -Path $TempCfgFile
}
5. Vagrantユーザーの追加
ローカルユーザーにVagrantユーザーを追加し、Administratorsグループに参加させます。
ユーザーのパスワードは"vagrant"にしています。
ADSIを使う場合は以下の手順となります。
# Create Vagrant User
$Computer = [ADSI]"WinNT://$Env:COMPUTERNAME,Computer"
$NewUser = $Computer.Create("user","vagrant")
$NewUser.SetPassword("vagrant")
$NewUser.SetInfo()
$NewUser.FullName = "Vagrant"
$NewUser.UserFlags = 65536 # ADS_UF_DONT_EXPIRE_PASSWD
$NewUser.SetInfo()
# Join Administrators Group
$AdminGroup = [ADSI]"WinNT://$Env:COMPUTERNAME/Administrators,group"
$AdminGroup.Add($NewUser.Path)
Windows Server 2016であれば上記の代わりにNew-LocalUserやAdd-LocalGroupMemberコマンドレットを使うことも可能です。
#
# Windows Server 2016以降であれば以下の様にしても良い。
#
New-LocalUser -Name "vagrant" -Password (ConvertTo-SecureString "vagrant" -AsPlainText -Force) -AccountNeverExpires -PasswordNeverExpires
Add-LocalGroupMember -Member "vagrant" -Group "Users"
Add-LocalGroupMember -Member "vagrant" -Group "Administrators"
6. Vagrantユーザーの公開鍵配置
この手順はWinSSH Communicatorに特有のものです。
VagrantがゲストVMに初回接続する際に必要な鍵(insecure_key)をVagrantユーザーの~\.sshディレクトリに配置しておきます。
この処理を行うためにはユーザープロファイルが出来ている必要があるため、前項の手順でVagrantユーザーを作った後にVagrantユーザーでログインして行ってください。
# Vagrantユーザーでログインして行う前提

# ~\.sshディレクトリの作成
if ( -not (Test-Path "~\.ssh" -PathType Container)) {
    mkdir "~\.ssh"
}
# insecure_key の配置
Invoke-WebRequest -Uri "https://raw.github.com/mitchellh/vagrant/master/keys/vagrant.pub" -OutFile "~\.ssh\authorized_keys"
# キーのアクセス権を設定
$acl = Get-Acl "~\.ssh\authorized_keys"
$ar = New-Object System.Security.AccessControl.FileSystemAccessRule("NT Service\sshd", "Read", "Allow")
$acl.SetAccessRule($ar)
Set-Acl "~\.ssh\authorized_keys" $acl
ちなみに、このinsecure_keyはconfig.ssh.insert_key = trueと設定されていれば初回接続後に別の新しい鍵に差し替えられる様になっています。
Boxファイルの作成と登録
Boxファイルの作成と登録についてはこちらのエントリを参照してください。
Vagrantfile設定例
WinSSH Communicatorを使う際はVagrantfileのCommunicatorを
config.vm.communicator = "winssh"
の様にwinsshと指定するだけでOKです。
SSHに関する設定はSSH Communicatorと共用されており、そのほかの設定についてはWinRM Communicatorの場合と同様です。
以下に簡単な設定例を挙げておきます。
# -*- mode: ruby -*-
# vi: set ft=ruby :

# All Vagrant configuration is done below. The "2" in Vagrant.configure
# configures the configuration version (we support older styles for
# backwards compatibility). Please don't change it unless you know what
# you're doing.
Vagrant.configure("2") do |config|

  config.vm.box = "Win2016SSHBox"
  config.vm.guest = "windows"

  # WinSSH Communicatorを使う
  config.vm.communicator = "winssh"

  # VMの設定は適当に
  config.vm.provider "virtualbox" do |vb|
    vb.gui = true
    vb.memory = "4096"
    vb.customize ["modifyvm", :id, "--cpus", "2"]
    vb.customize ["modifyvm", :id, "--paravirtprovider", "hyperv"]
  end
end
実行例
ここまで設定できればあとはvagrant upでゲストVMが立ち上がり良しなに設定がなされるはずです。

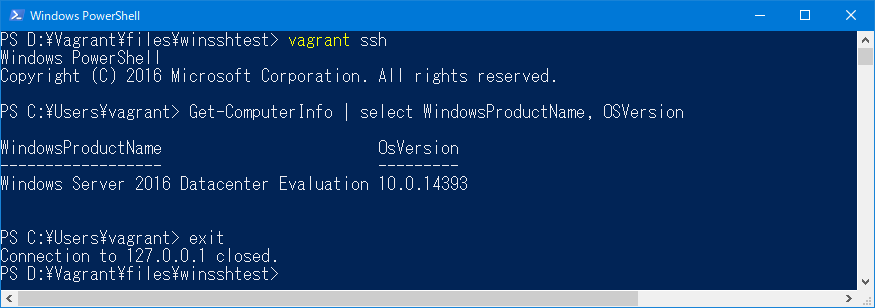
vagrant sshコマンドでゲストに接続することが可能です。

ちなみに、上手く動作しない場合は--debugオプションをつけて実行し、デバッグログを読んで気合で対処してください。
注意事項
ざっとWinSSH Communicatorについて説明してきましたがいくつか注意事項があります。
vagrant ssh -cコマンドが正しく動作しません
vagrant sshコマンドには-c [実行したいコマンド]をつけることでコマンドの単体実行が可能です。
ただ、このオプションの実装が、
[config.ssh.shellで設定されるシェル] -c [実行したいコマンド]
となっており、config.ssh.shellのデフォルトはbash -lである点、-cがハードコーディングされている点からWindowsゲストに対しては実質使えない*2ものとなっています。
一応、
config.ssh.shell = "powershell"
とすれば上手くいきそうなのですが、私の環境ではコンソールの描画が上手くいかずコマンドが成功しているのか判別できませんでした。
これは明らかに実装の考慮漏れなのでいずれ改善されるとは思います。
(気になるひとはIssue上げてください...)
Windows 10 Fall Creators Updateに組み込まれているOpenSSHを使う場合
本エントリを書くにあたり、事前にWindows 10 Fall Creators Update(1709)に組み込まれているOpenSSH Serverの機能を使った検証を行ったのですが、OSに組み込まれているOpenSSH Serverは現状ホストキーがed25519鍵しか対応しておらず、そのためかVagrantで上手く操作できませんでした。
根本的な原因を突き止めることはできませんでした...
このOpenSSH Serverの問題は今後のリリースで解消される見込みですがVagrant BoxにWindows 10を使う際はご注意ください。